VSCode is the IDE that we will be using in this course. This guide will show you the basics of navigation and operation of the program.
Overview
When you open VSCode you will be greeted with a screen that looks something like this.
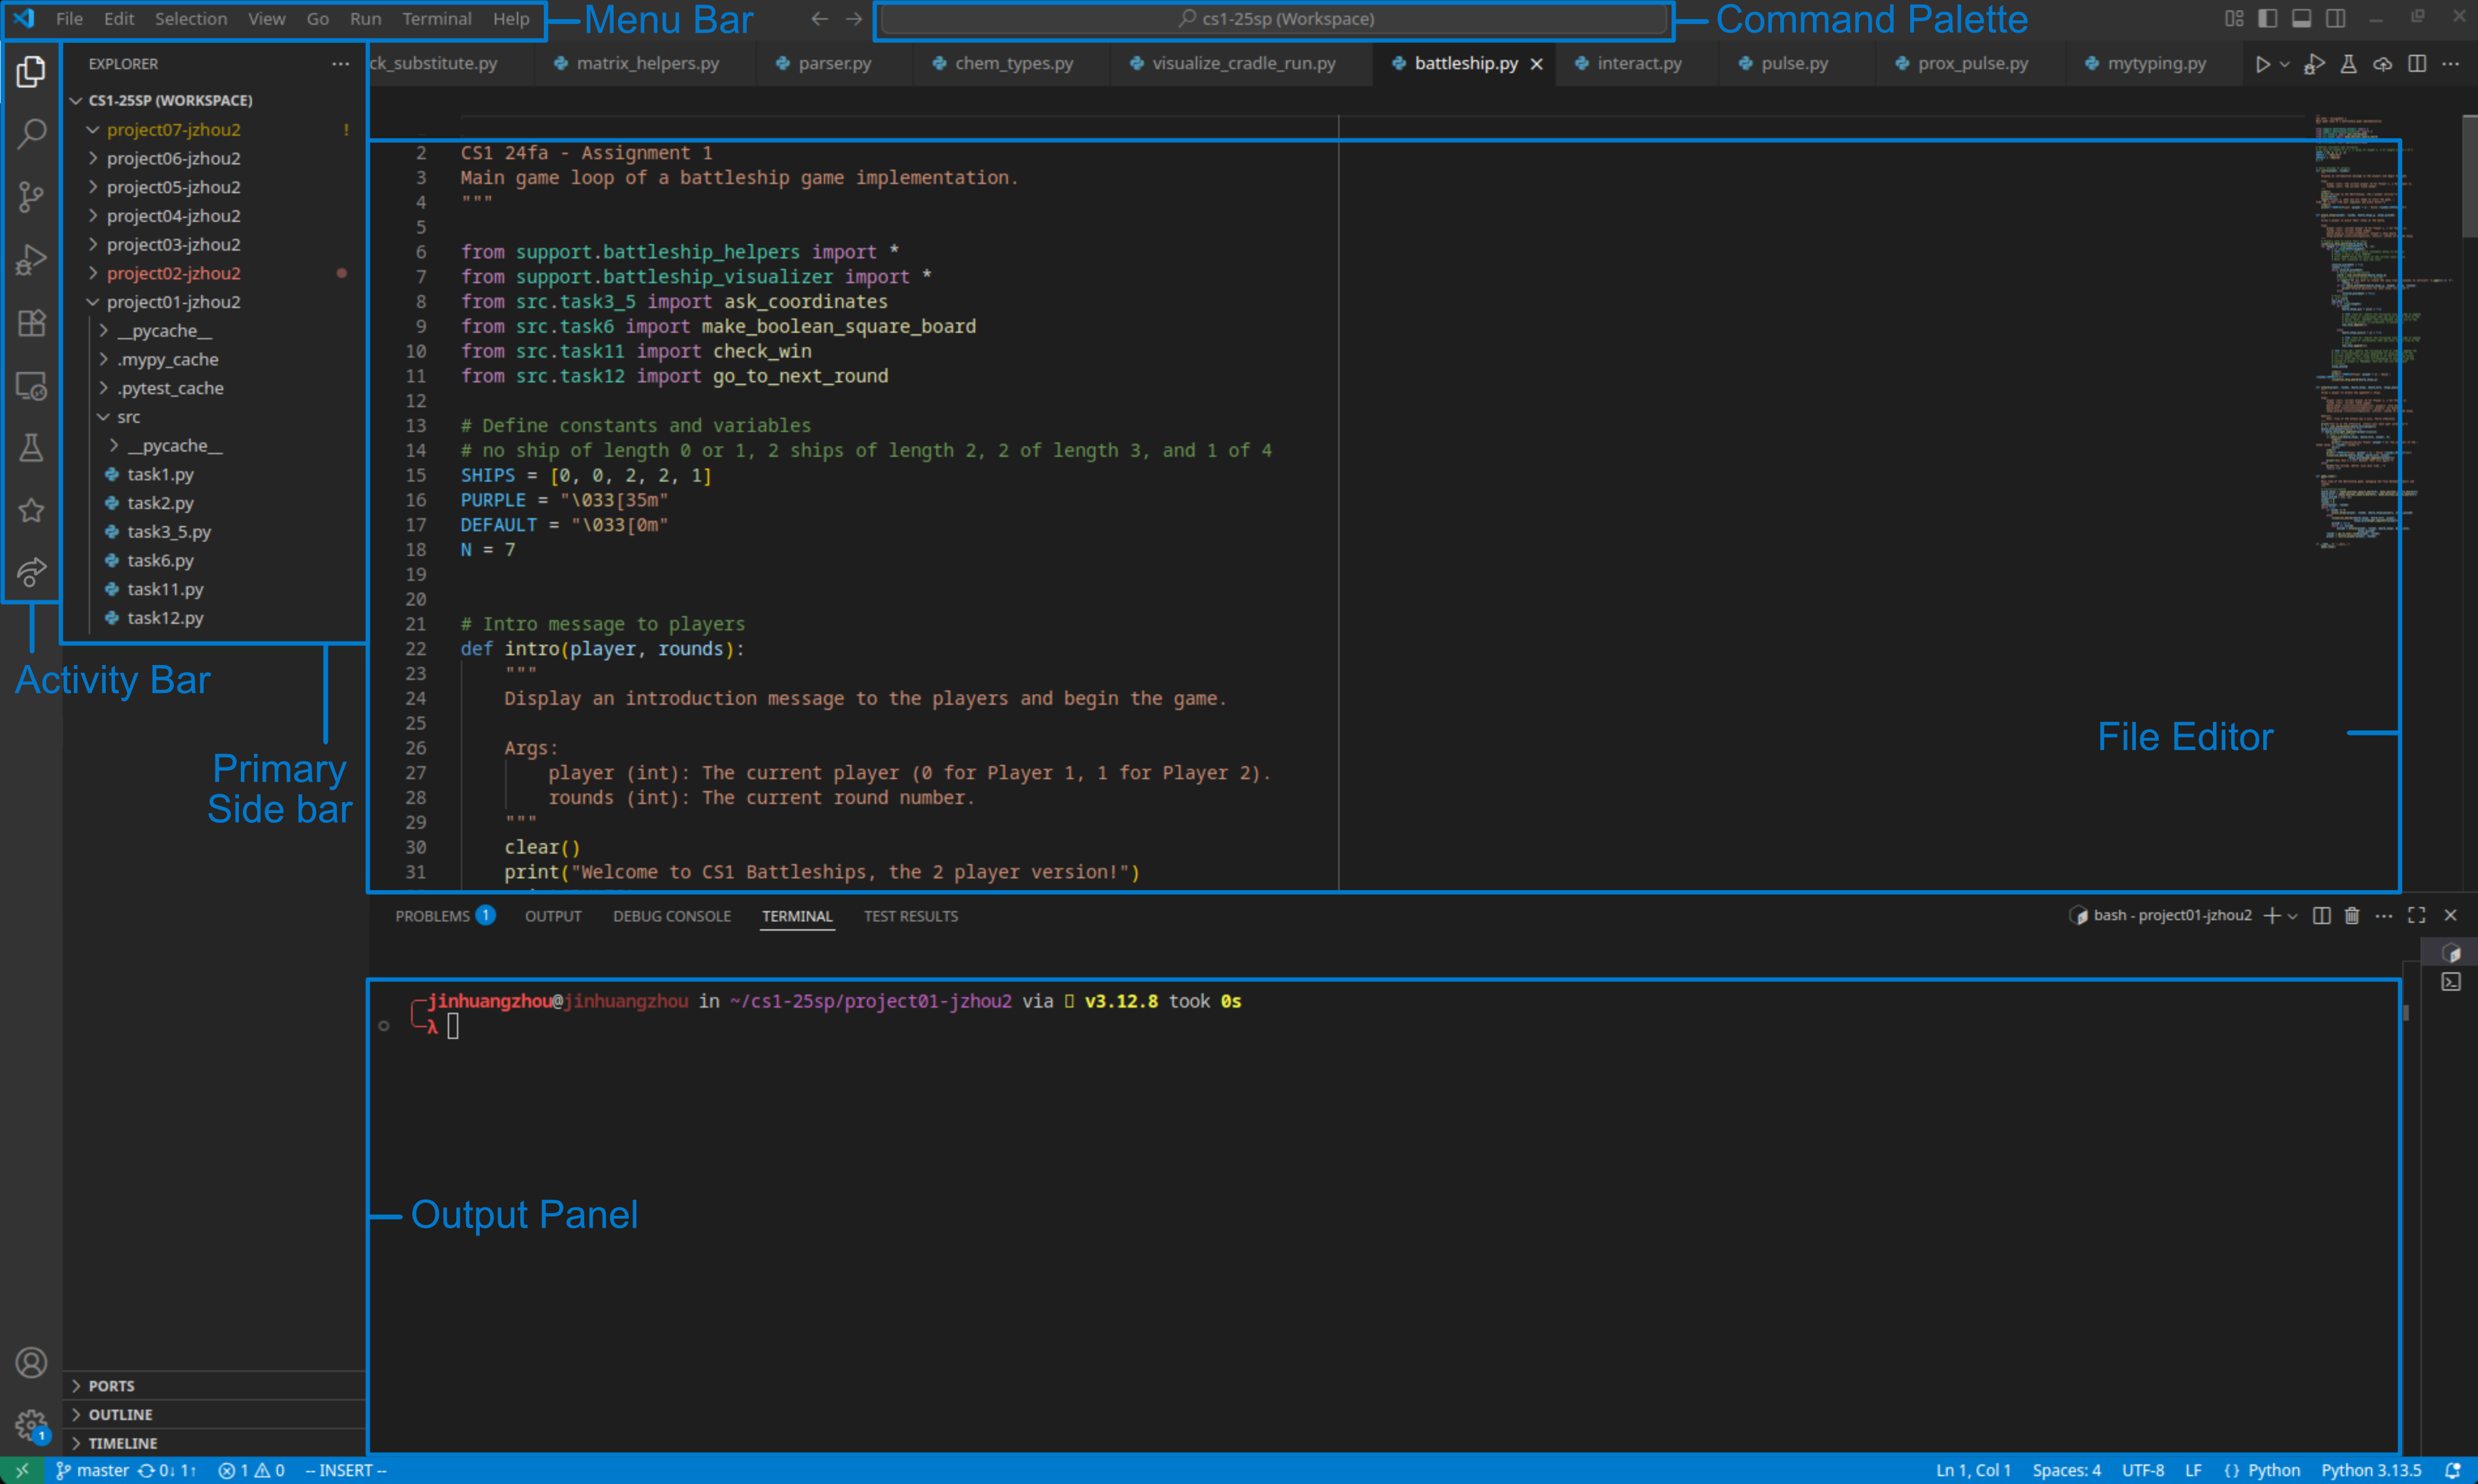
The editor is the large part of the screen where the text for your files will appear when you open them.
Activity Bar
The most important thing you will need to know how to use is the activity bar on the far left side of the window.
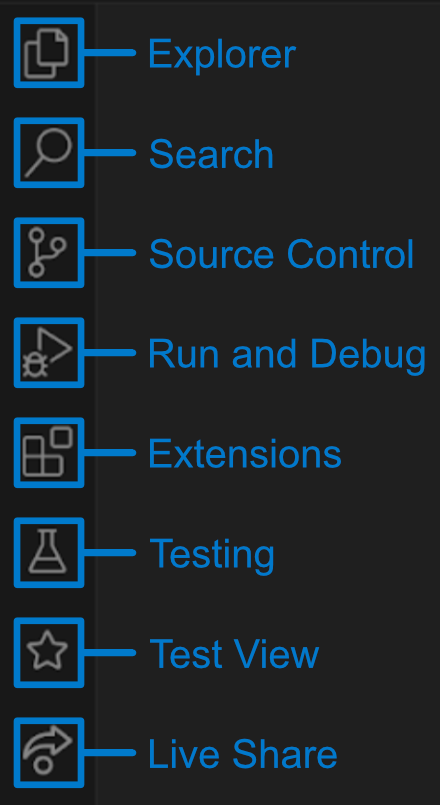
First is the Explorer button, which is the button with two files on it. Here you can access the folders and files in the workspace you are currently working in. This will be your main method of navigating your projects and files.
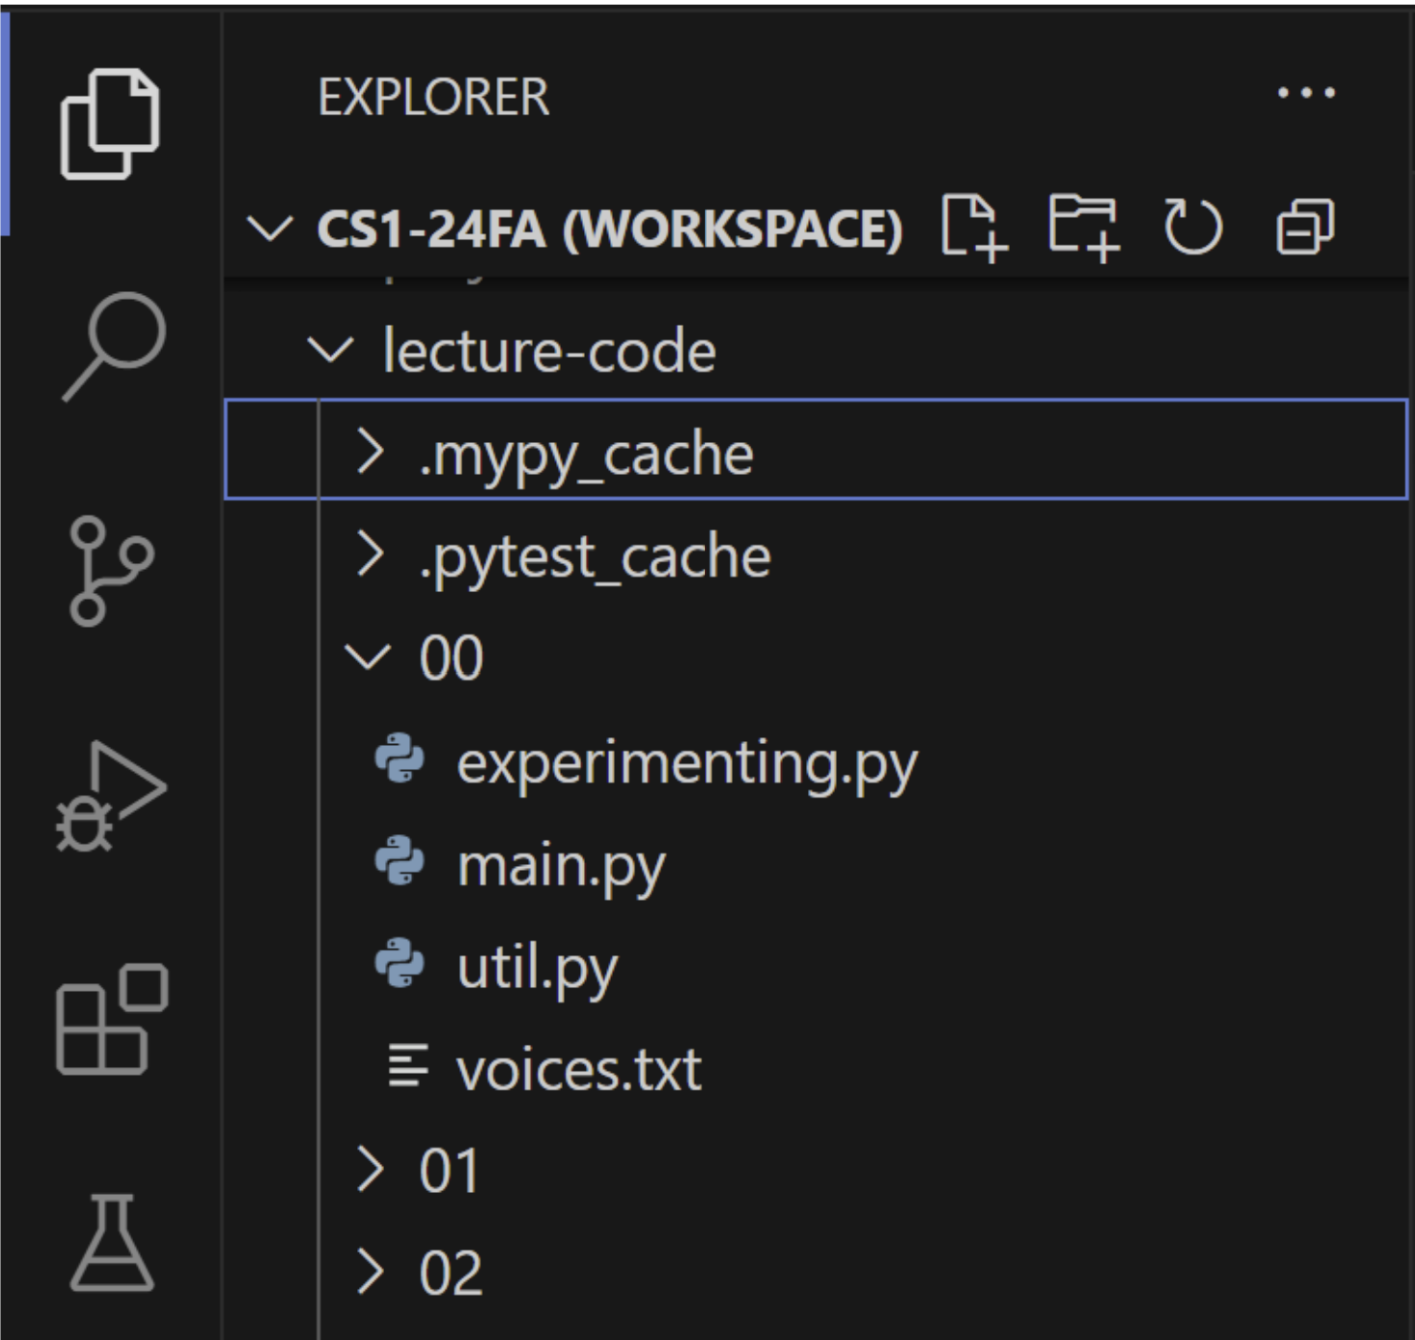
When you open a workspace or folder, it will look like this. Each tab with an arrow is a folder, and each one without an arrow is a file. Clicking on the folders whose arrows point right will expand them and show their contents, while clicking on folders whose arrows point down will collapse them and hide their contents. Clicking a file will open it in your editor until you open another file. Double clicking a file will open it in your editor and save it in a new tab when you open another file. These tabs are stored at the top of the window, below the menu bar, in a section called the tab bar.
At the top of the explorer column, where it shows the title of the outermost folder you’re working in (in this picture it says “CS1-24FA (WORKSPACE)”), you will find four buttons. From left to right, these buttons allow you to create new files, create new folders, refresh the explorer, and collapse all folders in the workspace, respectively. When creating new files or folders this way they will be created inside the parent folder of the selected file. You can also create a file or folder inside another folder by right clicking on that folder and selecting the appropriate button from the pop up menu.
Below the explorer button is the Search tool, which is the button with a magnifying glass. You can use it to search for specific words or segments of code within your files.
Next is the Source Control button, which is the button with 3 circles on it. For this class, we will not need to use it due to how we have set up gitlab. Outside of this class, you would use this tab when working in a normal Git repository to make commits and pull/push changes when working with others on the same code.
Next is the Run and Debug button, which is the button with a triangle and a bug on it. This lets you run and debug programs you write. However, you will not need to use this function in CS1 as we use our own tests and will run our code from another location.
Afterwards is the Extensions button, which is the button with four squares on it. From here you can manage the extensions installed to your VSCode. For this course, there are a few extensions you will need to install, which can be found in the “setup” documentation page.
Below that is the Testing button, which is the button with a beaker on it. From here you can run tests designed to catch errors in the code you have run. In this class, aside from one project, we will not be using this tab. You can read more about how to work with tests in the “Reading Test Output” document.
Next is the Test View button, the star. We will not be using this button in this class.
Lastly there’s the Live Share button, which has a circle and an arrow on it. From here you can work on code with other people at the same time. We will also not be using this function in the class.
Editor Toolbar
When you do open a project for CS1, at the top right of your editor, you will see the following three buttons.
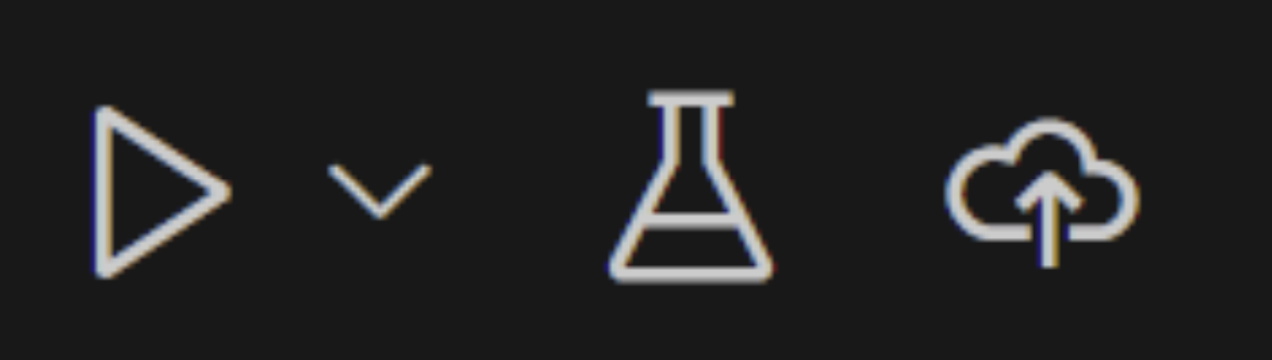
These will be the ones you need to use the most, excluding perhaps the explorer. The play button on the left will run the code on the selected file. The second button, the beaker, like before will be used to run the tests for your code. The cloud button on the right is used to upload your code to gitlab for your submission of the assignment.
Menu Bar
Depending on your operating system, either at the top of the screen or at the top of the window you will see the menu bar, which contains the “File” dropdown along with a few others.

From here you can create new files, and windows, open files, folders, and workspaces, save your files, and close your editors, workspaces, and windows.
In the “Edit” dropdown, you can select and see the shortcuts for actions like “Undo”, “Copy”, and “Find.”
The “Selection” dropdown has options for selecting text and creating new cursors.
The “View” dropdown allows you to change the appearance of your VSCode and open other tabs in VSCode such as the ones previously mentioned.
The “Go” dropdown has options for you to navigate within your workspace, folders and files.
Finally, the “Run” dropdown provides different actions related to running code and debugging.
Command Palette
At the top, in the middle of your screen you will see a text box called the command palette (as highlighted in the image at the top of the page). If you don’t, you can hit command+shift+P (all three keys at the same time) or control+shift+P depending on your operating system, to open it. This is the most versatile tool in VSCode. You can access most things in VSCode with this tool. If you know the commands you would like to use, you can type them in manually, but you can also browse the options available to you if you click on the bar.
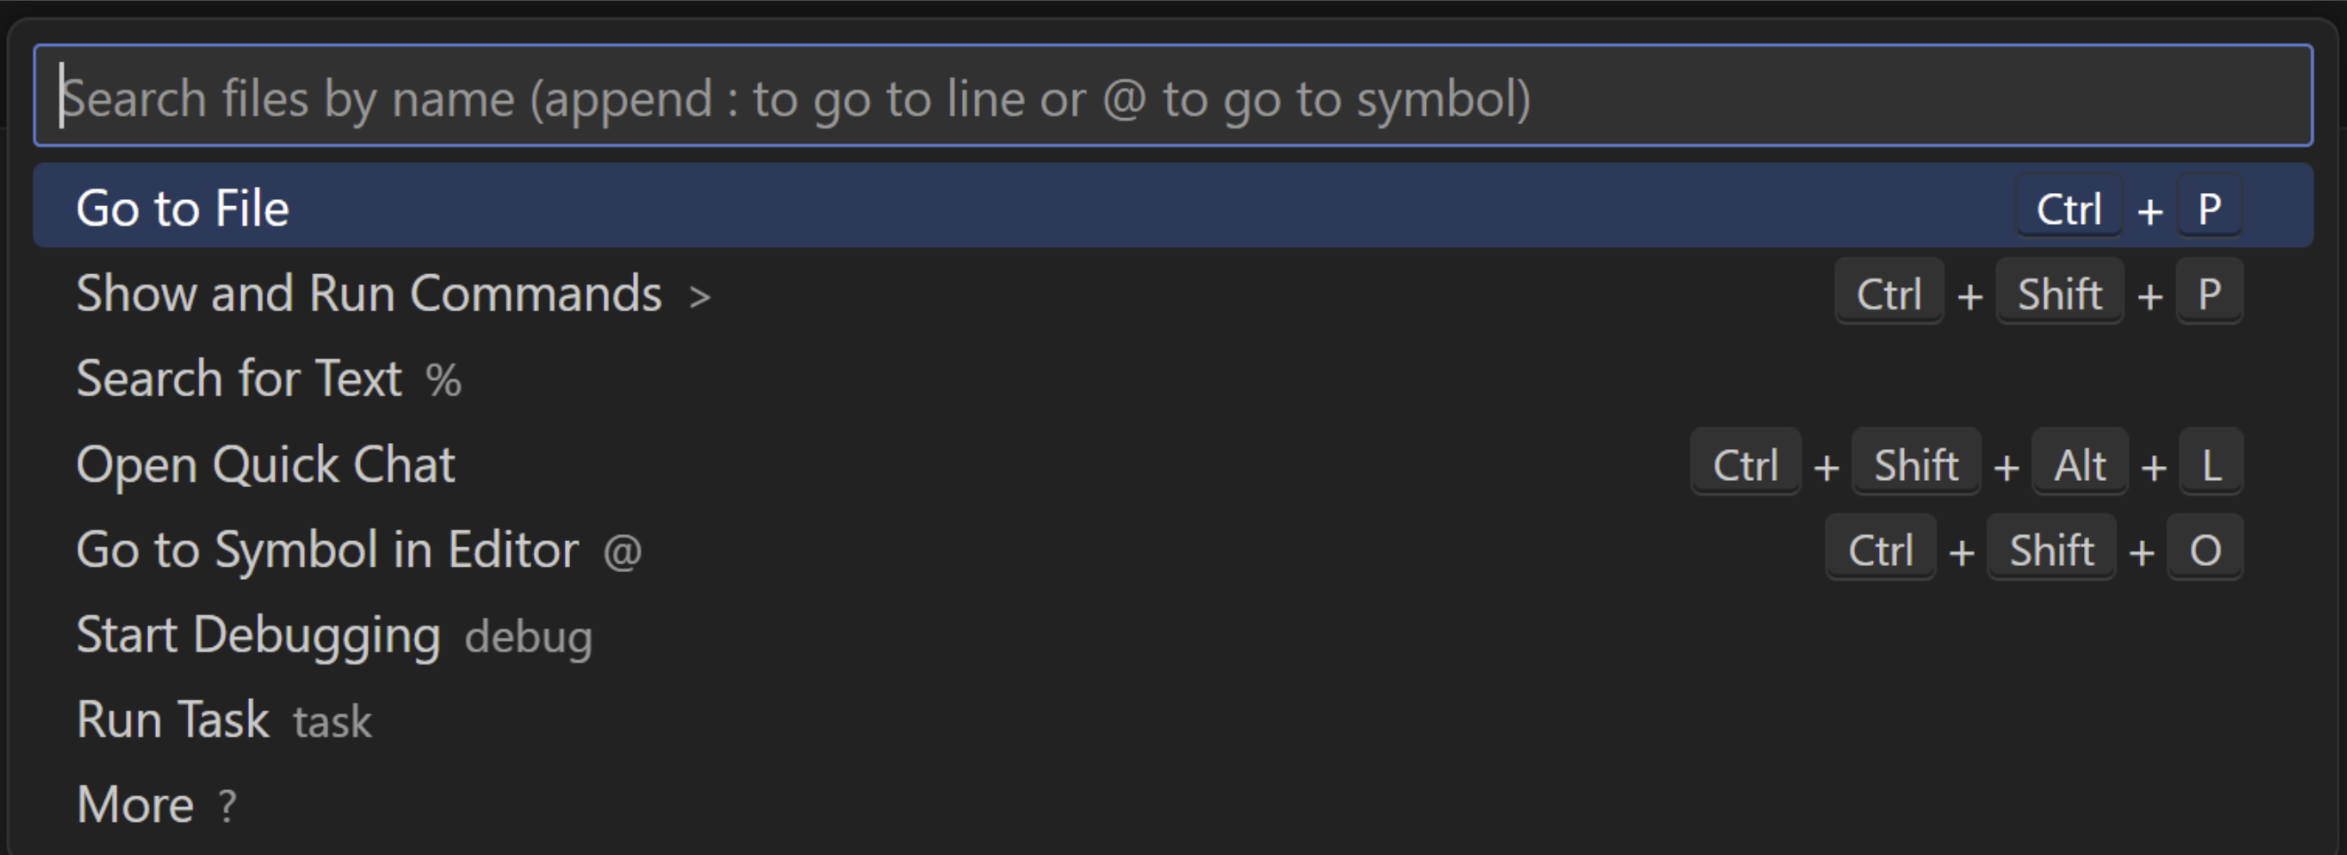
With the command palette opened, you can click on any of the options, depending on what you want to do. For example, some of the things you can do from the “Show and Run Commands” option include saving your files, creating a new python or java file, opening the settings, and opening a terminal, which we will go over next.
Output Panel
The Output panel will appear at the bottom of your editor window when you run code.
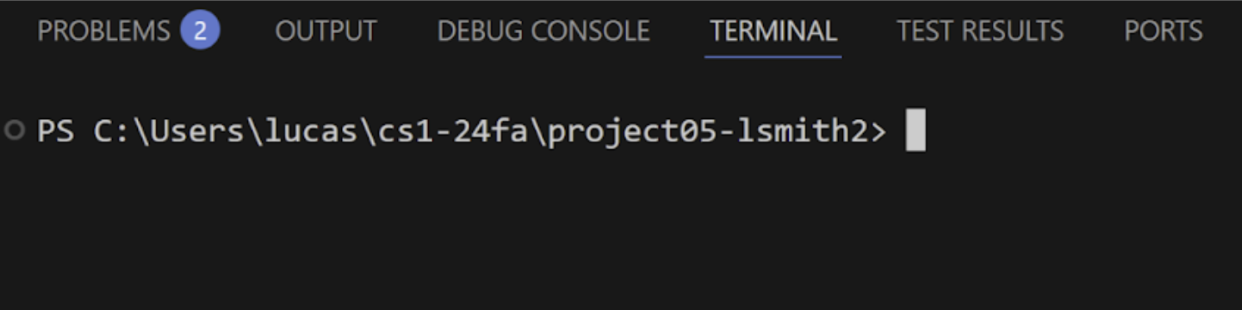
Here you will see the output of your code, like any print statements you have used, and traceback errors that tell you issues with your code and where they happened. In the menu above this panel, you can also access the terminal panel (this may be hidden under the three dots button in the menu). In the terminal, the text to the left of where you type in this panel tells you where you are in your computer’s file system, i.e. where you are accessing files. From here, using certain commands, you can navigate through file directories, execute programs, manipulate files, and install software. You will likely not need to use any commands in the terminal for CS1, but it is helpful to understand what it is and what it can do.
Please review the collaboration policy of the course. If you installed any generative AI extensions on vscode, including but not limited to Copilot, please uninstall them!
If you would like to learn more about how to use VSCode, feel free to check out their website here. Or, if you have any questions about anything discussed in this document, please come to OH! TAs would love to help out.